 Save
Save My grandmother's kitchen smelled like toasted spices the moment she'd pull out the bulgur for kibbeh. I was maybe eight, sitting on a stool in the corner, watching her wet her hands and shape each piece with the kind of practiced ease that only comes from decades of repetition. She never measured the spices by the teaspoon—it was always a pinch here, a three-finger grab there—but somehow every batch tasted exactly right. Years later, I finally asked her for the real recipe, and she laughed, knowing I'd need exact measurements to replicate what her hands already knew.
The first time I made kibbeh for someone else, I burned the filling because I got distracted telling my roommate about a terrible date. The pine nuts turned bitter, the whole thing tasted off, and I nearly ordered takeout in panic. But then I made a fresh batch, paid attention this time, and served them anyway with yogurt on the side. She ate five. That's when I realized kibbeh wasn't really about perfection—it was about showing up with intention.
Ingredients
- Fine bulgur wheat: The foundation of everything; soaking it properly means the difference between gummy dough and something that holds together beautifully when fried.
- Lean ground beef or lamb: Don't use the cheapest option—a bit of fat keeps things moist, but too much makes the filling greasy and the dough hard to work with.
- Allspice and cinnamon: These warm spices are what make kibbeh taste like kibbeh; there's no real substitute, so buy fresh if you can.
- Pine nuts: They toast in seconds, so watch them carefully or you'll end up with bitter black specks instead of golden crunch.
- Cold water: Keep it handy when kneading; the dough needs just enough to hold but not so much that it falls apart in oil.
Tired of Takeout? 🥡
Get 10 meals you can make faster than delivery arrives. Seriously.
One email. No spam. Unsubscribe anytime.
Instructions
- Soften the bulgur:
- Rinse it thoroughly under cold water, then let it sit for 10 minutes while you prep everything else. You'll feel it transform from grain to something almost velvety under your fingers.
- Knead the dough:
- Combine the softened bulgur with meat, onion, and spices, then work it like bread dough, adding cold water one tablespoon at a time. It should feel smooth and slightly sticky, holding together when you squeeze it.
- Make the filling:
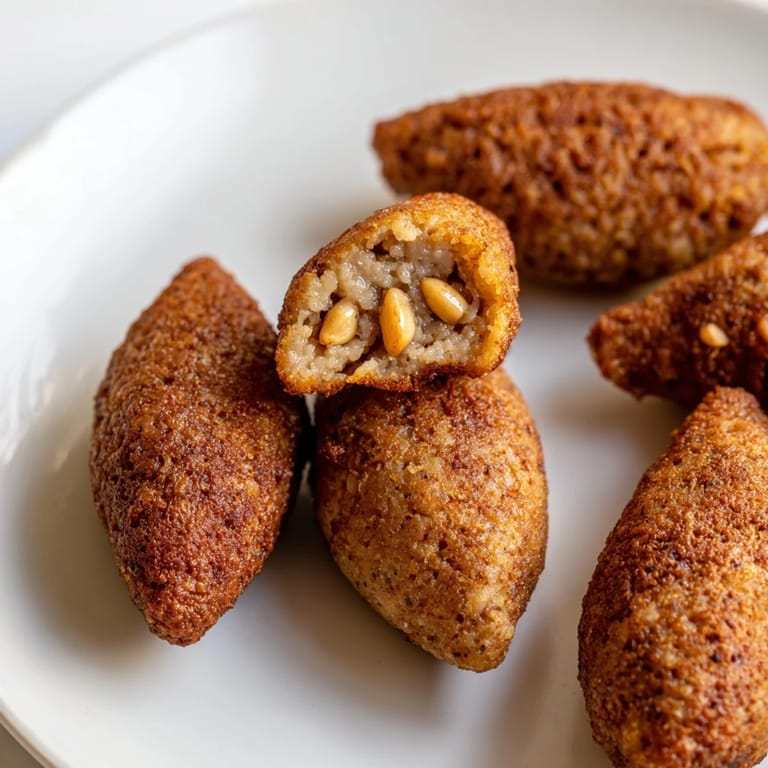
- Sauté onions until soft, add meat, then the pine nuts last so they toast without burning. You'll know it's done when the kitchen smells like a Lebanese restaurant and you can't stop sniffing the pan.
- Shape with wet hands:
- Wet your hands between each piece so the dough doesn't stick. Take about the size of a golf ball, flatten it into a thin oval, add filling in the center, then pinch and shape into a torpedo form.
- Fry or bake:
- If frying, heat oil to 180°C and cook until deeply golden, about 4–5 minutes per batch. If baking at 200°C, brush with olive oil and bake for 25–30 minutes, turning halfway through.
 Save
Save There's a moment right before the oil gets hot enough where you start second-guessing yourself, wondering if you shaped them right, if the filling will leak out, if anyone will actually enjoy what you've made. Then the first batch hits the oil and puffs up golden, and that doubt just melts away.
Choosing Your Cooking Method
Frying gives you that restaurant-perfect golden crust and that satisfying crunch, but baking is gentler on your oil budget and your kitchen ventilation. I fry when I have time and people to impress, and I bake when I'm cooking for myself on a quiet Tuesday. Both are entirely valid, and honestly, the filling tastes exactly the same either way.
The Perfect Accompaniments
Serve kibbeh warm with thick yogurt for dipping, or drizzle tahini sauce over the top if you want something earthier. A simple salad of tomatoes, cucumbers, and fresh herbs cuts through the richness and makes the whole meal feel balanced and complete.
Storage and Make-Ahead Tips
Kibbeh can be frozen raw for up to three months, which means you can shape a huge batch on one weekend and fry them straight from the freezer whenever you need them. Just add a minute or two to the cooking time—don't thaw them first, or the filling will leak everywhere.
- Raw kibbeh freezes beautifully for up to three months, so make extras and fry from frozen.
- Cooked leftovers keep in the fridge for three days and reheat well in a 160°C oven.
- For a vegetarian version, swap the meat filling for cooked lentils and sautéed mushrooms seasoned the same way.
 Save
Save These little packets of spiced meat and bulgur have a way of bringing people together. Make them once, and you'll understand why.
Recipe FAQ Section
- → What is kibbeh dough made from?
The dough combines fine bulgur wheat with ground meat, onions, and warm spices such as allspice and cinnamon, kneaded with cold water to a smooth consistency.
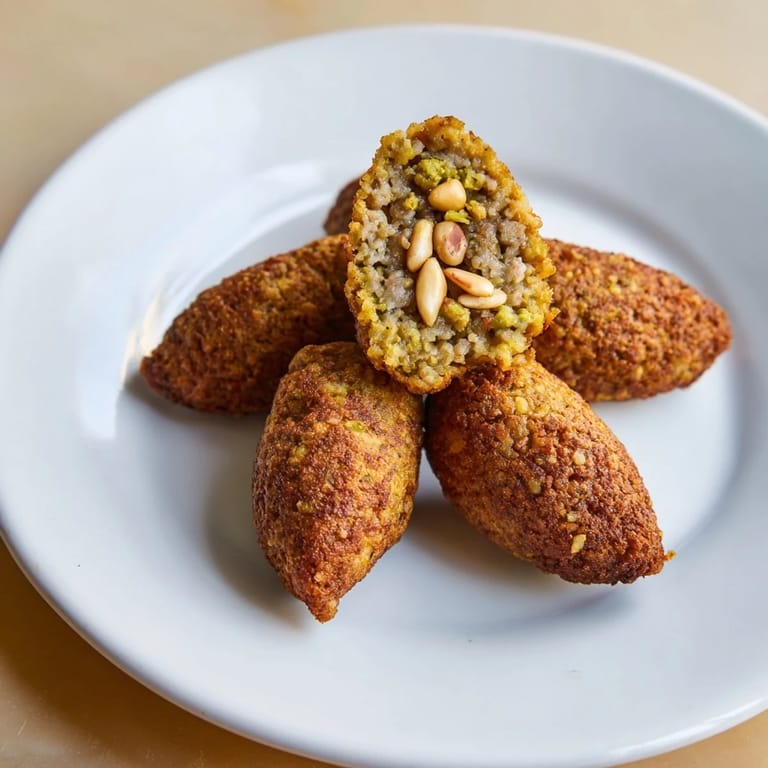
- → How do you prepare the kibbeh filling?
The filling consists of browned ground meat sautéed with onions, pine nuts, and spices, creating a rich and aromatic center for each croquette.
- → Can kibbeh be baked instead of fried?
Yes, kibbeh can be baked at 200°C (390°F) brushed with olive oil until crisp and golden, offering a lighter alternative to frying.
- → What spices are used to flavor the kibbeh?
Key spices include ground allspice, cinnamon, black pepper, and salt, contributing to the dish’s warm and balanced taste.
- → Is it possible to freeze kibbeh before cooking?
Absolutely, kibbeh croquettes can be frozen for up to 3 months and cooked directly from frozen when ready.