 Save
Save My neighbor called at 8 AM on a Tuesday—her daughter was graduating that Saturday, and she needed a cake that wouldn't stress her out. We'd chatted over the fence a hundred times, but this was the first time she'd asked me to bake something that mattered. I suggested a sheet cake because they're honest and forgiving, and because I remembered how my own kitchen felt the night before my graduation, chaotic and full of hope. This vanilla cake became our secret weapon: simple enough to make the morning of, but elegant enough to sit proudly at the center of a celebration.
What I love most is watching people's faces when they see their graduation year piped across the cake in bold, bright letters. My neighbor's daughter walked into the kitchen that morning and just stood there, reading "Class of 2026" in her school colors, and something shifted in her expression—suddenly it felt real. The cake wasn't just dessert; it was a marker, a tangible "you made it." That's when I realized why sheet cakes matter so much at celebrations: they're big enough to symbolize something, yet simple enough that the focus stays on who you're honoring.
Ingredients
- All-purpose flour (2 ½ cups): The foundation of a tender crumb—measure by spooning into your measuring cup and leveling off, never scooping straight from the bag, or you'll pack it too tight.
- Baking powder (2 ½ tsp): This is what makes the cake rise evenly and keeps it light; use fresh powder that hasn't been sitting open in your cabinet for three years.
- Salt (½ tsp): A tiny pinch that amplifies vanilla flavor without anyone tasting salt—don't skip it.
- Unsalted butter (1 cup for cake, 1 cup for frosting): Room temperature is non-negotiable; cold butter won't cream properly and you'll end up with dense cake instead of fluffy.
- Granulated sugar (1 ¾ cups): The creaming process with butter is where all the air gets trapped, so beat it for the full three minutes until the mixture looks pale and thick.
- Eggs (4 large): Room temperature, because cold eggs won't blend smoothly into the batter and can cause lumps.
- Vanilla extract (1 tbsp for cake, 2 tsp for frosting): Use real vanilla if you can; it tastes noticeably better than imitation, especially in something this simple.
- Whole milk (1 cup plus ¼ cup): The alternating method—flour, milk, flour, milk, flour—keeps the batter from becoming tough.
- Powdered sugar (4 cups, sifted): Sift it first to break up lumps, otherwise your frosting will have little gritty pockets.
- Food coloring: Gel colors are more vibrant than liquid and won't thin your frosting; a toothpick dab goes a long way.
Tired of Takeout? 🥡
Get 10 meals you can make faster than delivery arrives. Seriously.
One email. No spam. Unsubscribe anytime.
Instructions
- Set the stage:
- Preheat your oven to 350°F and grease a 9x13-inch pan with butter or cooking spray, then line it with parchment paper so the cake lifts out cleanly. This step takes two minutes but saves you from chocolate-brown edges on half the cake.
- Combine the dry ingredients:
- Whisk your flour, baking powder, and salt together in a medium bowl—this distributes the leavening evenly so you don't get dense pockets. Set it aside and move on.
- Cream the butter and sugar:
- In a large bowl, beat softened butter and sugar together for about three minutes until it looks pale, fluffy, and almost mousse-like; this is where the magic happens. If you rush this, your cake will be dense and your guests will notice.
- Add the eggs one by one:
- Add eggs individually, beating well after each one—this prevents scrambled texture and helps everything emulsify smoothly. The mixture should look creamy and smooth, not separated or curdled.
- Mix in the vanilla:
- Stir in your vanilla extract and let it blend for a few seconds, then you're ready for the next step.
- Alternate the flour and milk:
- Starting and ending with flour, add the dry mixture and milk in three parts—this keeps the batter from becoming overworked and tough. Stir just until combined; lumps are okay, but overmixing is not.
- Pour and bake:
- Transfer the batter to your prepared pan, smooth the top gently, and slide it into the oven for 30 to 35 minutes. You'll know it's done when a toothpick inserted in the center comes out clean or with just a few moist crumbs clinging to it.
- Cool completely:
- Let the cake cool all the way down in the pan on a wire rack; this prevents frosting from melting and sliding off. Don't rush this step, or you'll regret it.
- Make the frosting:
- Beat softened butter until creamy, then gradually add sifted powdered sugar, milk, vanilla, and salt; keep beating for three to five minutes until fluffy and cloud-like. If you want multiple colors, divide the frosting now and tint each portion with gel food coloring.
- Frost the cake:
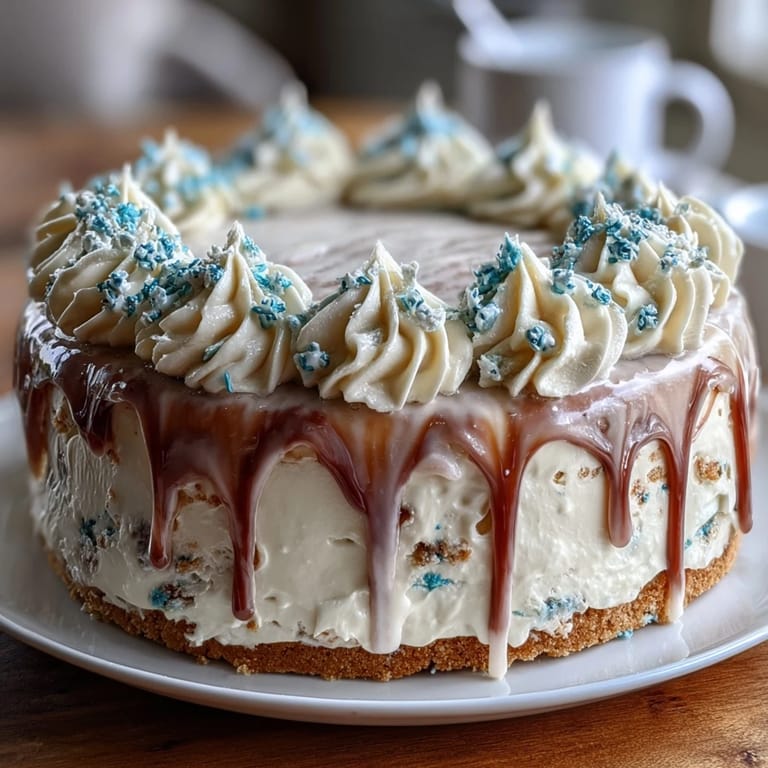
- Spread an even layer of buttercream across the cooled cake using an offset spatula or the back of a spoon. Take your time here—even frosting looks intentional and polished.
- Pipe the celebration:
- Transfer tinted frosting into a piping bag fitted with a small round tip, and pipe your Class year or message across the top in bold, confident strokes. If you mess up a letter, smooth it back into the frosting and try again—no one will know.
 Save
Save I watched my neighbor frost this cake with her daughter hovering nearby, asking questions about why the frosting had to be so smooth and whether the piping had to be perfect. By the end, they were laughing over a slightly wonky "2026," and it didn't matter one bit—it was theirs, made together, and that's what made it matter. The cake fed thirty people at the graduation party, and someone took a photo of it that my neighbor still has on her phone.
Why Sheet Cakes Are Underrated
There's something humble about a sheet cake, and that humility is actually its strength. Layer cakes are stunning, but sheet cakes are democratic—they're not trying to prove anything, and they taste just as good from the corner as from the center. I've learned that the best cakes for celebrations are the ones that don't demand a fancy cake server or careful plating; they're meant to be cut straight from the pan and slid onto a plate, frosting and all.
The Science of Creaming
The moment when butter and sugar transform from separate ingredients into something pale and fluffy is genuinely magical, and it's the foundation of this cake's texture. That three-minute beat isn't just mixing; it's incorporating thousands of tiny air bubbles that expand in the oven and make the cake light and tender instead of dense. I used to skip this step and wondered why my cakes felt heavy until a friend watched me bake and asked why I wasn't creaming long enough.
Making It Your Own
The beauty of this cake is how personal you can make it without compromising the recipe. School colors, favorite sprinkles, even a hint of almond extract stirred into the batter—these small touches transform a simple cake into a custom celebration. I've learned that the recipes people treasure most are usually simple enough to customize and forgiving enough to let you experiment.
- Add ½ tsp almond extract to the batter for subtle depth if vanilla alone feels too plain.
- Match your frosting colors to school colors, team colors, or even the graduate's favorite hues.
- Store leftovers covered at room temperature for two days, or refrigerate for up to five days—the cake only gets more moist as it sits.
 Save
Save This cake is proof that celebrations don't require complicated recipes or fancy techniques—just care, freshness, and the willingness to show up for someone's big moment. Make it the night before or the morning of, frost it with intention, and watch how something so simple becomes the thing people remember.
Recipe FAQ Section
- → How do I ensure the cake stays moist?
Use room-temperature ingredients and avoid overmixing the batter. Baking just until a toothpick comes out clean helps maintain moisture.
- → Can I customize the buttercream colors?
Yes, food coloring can be added to portions of the frosting to match any theme or school colors.
- → What pan size is best for this sheet cake?
A 9x13-inch sheet pan provides ideal thickness and even baking for this cake.
- → How long can the cake be stored?
Store covered at room temperature for up to 2 days or refrigerate for up to 5 days for freshness.
- → Can dairy substitutes be used?
Yes, non-dairy milk can replace whole milk. Ensure other ingredients accommodate dietary needs.
- → Is it necessary to use parchment paper?
Parchment paper prevents sticking and makes it easier to remove the cake cleanly from the pan.