Save
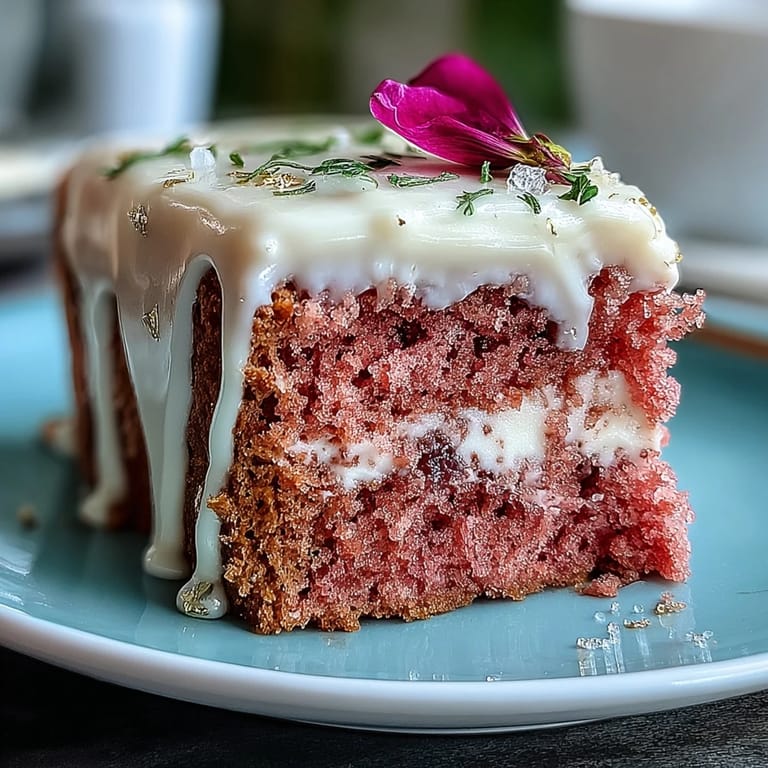
Save When I first decided to attempt a cake worthy of a bridal shower centerpiece, the idea of a rosy-hued velvet confection with an ethereal gold drip was too irresistible to pass up. The challenge wasn’t just in flavor—it was in achieving that delicate blush tone and a frosting with subtle hints of celebration. Flour dust floating in morning sunlight, the sound of a mixer, faint traces of rosé perfuming my kitchen, it all set the mood. There was a feeling of anticipation, like I was crafting more than just dessert; I was baking up a little bit of joy to share. Every time I make this cake, it’s a tiny celebration in itself.
The first time I brought this Rosé Velvet Cake to my friend’s spring bridal shower, the room paused the moment I walked in. A few guests even hovered, whispering questions about the gold drip as if it were some mysterious alchemy. Frosting smudges ended up dotting my apron, laughter echoed from across the table, and a gentle pop of cork in the background seemed to bless the occasion. The excitement in the air made icing each layer feel like tying a ribbon on a special gift. Admittedly, there was a bit of a scramble to get the edible gold just right, but no one minded my anxious focus.
Ingredients
- All-purpose flour: Sifting the flour first is key for a fine crumb, keeping each layer tender.
- Granulated sugar: Creaming it thoroughly with butter gives that airy, classic velvet cake base.
- Baking soda & baking powder: These leaveners work together for a beautiful rise—measure carefully for the perfect lift.
- Salt: Just enough sharpness to balance the sweetness; don’t skip it.
- Unsweetened cocoa powder: Adds depth and the subtlest chocolate undertone to the blush cake, but too much will muddy the rosy hue.
- Unsalted butter: Softened butter is your friend for both cake and frosting; I like to leave it out for at least an hour before baking.
- Buttermilk: Room temperature buttermilk brings moisture and tang—if it’s cold, your batter could seize.
- Rosé wine: Pick one you’d actually drink; the flavor matters more than you think.
- Large eggs: Always room temperature—cold eggs can make your batter curdle or bake unevenly.
- Vanilla extract: A generous splash rounds out the floral notes from the rosé.
- White vinegar: Reacts with baking soda for ultimate tenderness and helps keep the blush color bright.
- Pink food coloring gel: Go slow and add drops until the batter is a gentle, romantic shade.
- Cream cheese: Needs to be truly soft for a lump-free frosting, so let it sit out with the butter.
- Powdered sugar: Sifted, always, for silkiest results in your frosting—those sneaky clumps are never fun to find.
- Heavy cream: Just two tablespoons loosen the chocolate for a perfectly smooth drip.
- White chocolate chips: Melt slowly and gently for drip success; be patient with warming.
- Edible gold luster dust: This transforms the cake from pretty to jaw-dropping—don’t worry, a little goes a long way.
- Vodka or clear extract: Needed for mixing with the luster dust to paint your final masterpiece.
Tired of Takeout? 🥡
Get 10 meals you can make faster than delivery arrives. Seriously.
One email. No spam. Unsubscribe anytime.
Instructions
- Prep the Pans:
- Trace parchment rounds for three 8-inch pans and neatly butter every corner before dusting with flour.
- Sift and Combine Dry Ingredients:
- The soft snow of flour and cocoa sifting together makes a lovely cloud—breathe in that gentle chocolate aroma.
- Cream Butter and Sugar:
- Let your mixer do the heavy lifting here until the mixture looks pale and fluffy.
- Add the Eggs and Vanilla:
- Crack in eggs one by one, blending after each, then splash in the vanilla and watch the batter turn satiny.
- Mix in Buttermilk, Rosé, and Vinegar:
- Pour these gently, and enjoy how the batter softens and loosens, carrying hints of wine and tang.
- Add Dry Ingredients and Color:
- Fold sifted flour mixture in gradually, stopping to scrape down the bowl, and swirl in pink coloring until just blushing and dreamy.
- Bake the Cakes:
- Divide the batter evenly and pop pans in the oven; soon the sweet scent will drift through your kitchen.
- Cool Completely:
- Wait until cakes are just warm before turning them onto wire racks—you’ll know they’re ready when they feel barely tacky to the touch.
- Make the Frosting:
- Beat butter and cream cheese into a smooth, pillowy base before slowly adding powdered sugar, then finish with your rosé and a pinch of salt.
- Assemble and Crumb Coat:
- Layer cakes with generous swoops of frosting, smoothing the surface as you go, then spread a thin crumb coat and chill until set.
- Finish Frosting and Chill:
- Cover the cake completely, chill again, and marvel at your smooth, gently blushing creation.
- Prepare the Gold Drip:
- Microwave white chocolate and cream in short bursts until glossy, then let it cool just enough to create slow, elegant drips over the cake’s edge.
- Paint the Gold:
- Mix luster dust with vodka; then, with a steady hand, transform each drip into gold with a fine paintbrush.
- Final Chill Before Serving:
- Slip the whole cake into the fridge for half an hour, letting the flavors mingle and every layer set to perfection.
 Save
Save  Save
Save The moment I sliced into this cake—layers perfectly even, gold shimmer trying to catch every bit of afternoon light—I realized it wasn’t just a sweet treat. It had become a backdrop for laughter, toasts, and wide-eyed celebration—a centerpiece full of edible memories.
Choosing the Right Rosé Matters
The biggest surprise with this cake is how much the wine you pick makes a difference. I once splurged on a bottle with pretty floral notes, and the subtlety came through right out of the oven. Drier rosés bring out a more sophisticated, delicate flavor, while fruity versions hint at strawberries. The lesson: treat your cake batter like you’re pouring a glass for a friend—choose a bottle you genuinely enjoy sipping.
Decorating Tips That Make It Shine
Your first gold drip might be more Jackson Pollock than chic Parisian, and that’s absolutely fine. Using a squeeze bottle gives the most control—you get to decide where every dazzling trail lands. Chilling the cake before dripping is non-negotiable; a warm cake will melt your white chocolate before you even begin painting. Practice painting on parchment first to nail the brushstrokes without pressure.
Getting Ahead for Party Day
Bridal showers and big bakes call for planning. I’ve found that baking the cake layers the night before helps cut day-of stress, and they even freeze beautifully wrapped in cling film. Make the frosting a few hours ahead so it’s ready to go—just bring it back to spreadable temp before assembling.
- If you’re nervous about the gold drip, try it on mini cupcakes for practice.
- Let guests see the cake before you cut—it makes for the prettiest photos.
- Keep the cake in the fridge until 20 minutes before serving for the perfect slice.
 Save
Save  Save
Save Here’s to making every celebration sparkle a little brighter—especially when there’s cake dusted in gold waiting to be shared. May every slice be as memorable as the occasion itself.
Recipe FAQ Section
- → How can I boost the rosé flavor?
Brush cooled cake layers with a little reserved rosé wine or a reduced rosé syrup before assembling. You can also fold a small amount of rosé into the frosting for a more pronounced note without thinning the icing.
- → What non-alcoholic swap keeps the same profile?
Use sparkling grape juice or a concentrated grape reduction in place of rosé. Reduce the liquid slightly to avoid adding excess moisture, and taste as you incorporate to maintain balance.
- → How do I get an even blush color without changing texture?
Use gel or paste food coloring added a little at a time to the batter; gel gives intense color without extra liquid. Mix thoroughly until uniform and bake immediately to preserve hue.
- → Tips for a smooth, controlled gold drip?
Melt white chocolate with heavy cream and cool until slightly thick but still pourable. Apply drip from the edge with a spoon or squeeze bottle, then mix gold luster dust with a small amount of vodka or clear extract and gently paint the set drip with a food-safe brush.
- → How should I store the finished cake?
Refrigerate covered for up to 2–3 days. Bring to room temperature before serving for best texture and flavor; let sit 30–60 minutes depending on chill level.
- → Can I bake layers ahead and freeze them?
Yes. Wrap cooled layers tightly in plastic and freeze up to one month. Thaw overnight in the refrigerator, then return to room temperature before leveling, filling and frosting.