Save
Save There's something about baking for celebrations that makes the kitchen feel like the heart of the moment. My neighbor knocked on my door two weeks before her son's graduation, asking if I could whip up something special for his party—something that felt festive but wasn't fussy. These cookie bars came together almost by accident that afternoon, the kind of recipe that seems to know what you need before you do. The combination of melty chocolate, candy pops of color, and that elegant white chocolate drizzle turned out to be exactly the vibe we were going for.
I still laugh thinking about that graduation party—someone's grandmother asked for the recipe before she even finished her first bar, and three different people requested them for upcoming events. That's when I knew this wasn't just a recipe; it was the kind of thing people actually want to make again.
Ingredients
- All-purpose flour (2 1/4 cups): The foundation that holds everything together without making these bars dense or cakey, just perfectly chewy.
- Baking soda (1 tsp): This is your secret to that slight chewiness in the center—don't skip it or overshadow it with extra leavening.
- Salt (1/2 tsp): A tiny pinch that makes the sweetness sing and brings out the chocolate flavor in ways people can't quite name.
- Unsalted butter, melted (1 cup): Melt it completely, then let it cool just a touch so it doesn't scramble the eggs when you combine them.
- Brown sugar (1 cup packed): This gives the bars their signature chew and subtle molasses depth that granulated sugar alone can't achieve.
- Granulated sugar (1/2 cup): Together with the brown sugar, this creates the perfect texture balance and helps them bake evenly.
- Eggs (2 large): Room temperature if you remember, but honestly room-temperature or cold both work—they bind and create structure.
- Vanilla extract (2 tsp): Use pure vanilla if you have it; the flavor difference is noticeable and worth the small splurge.
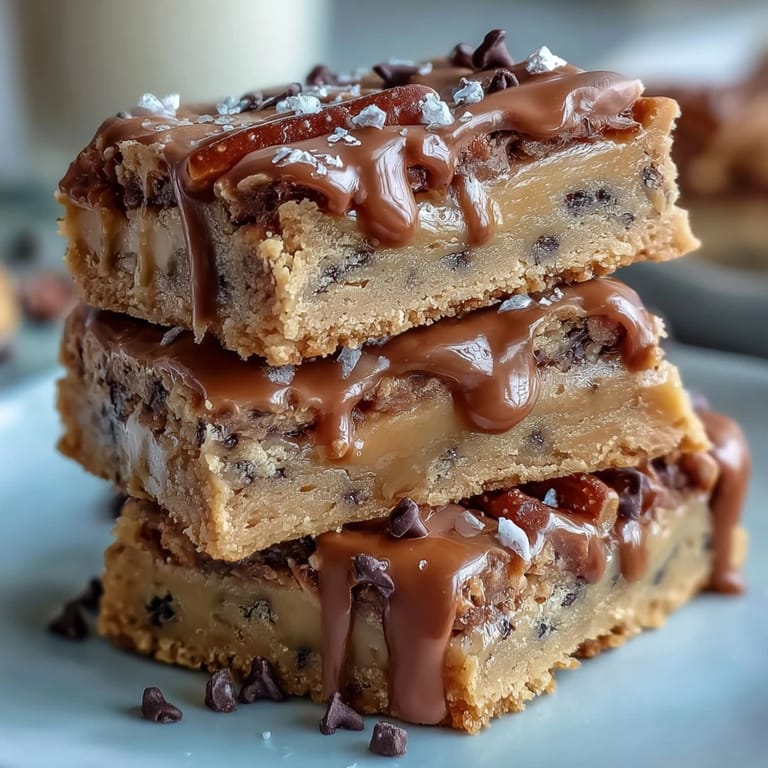
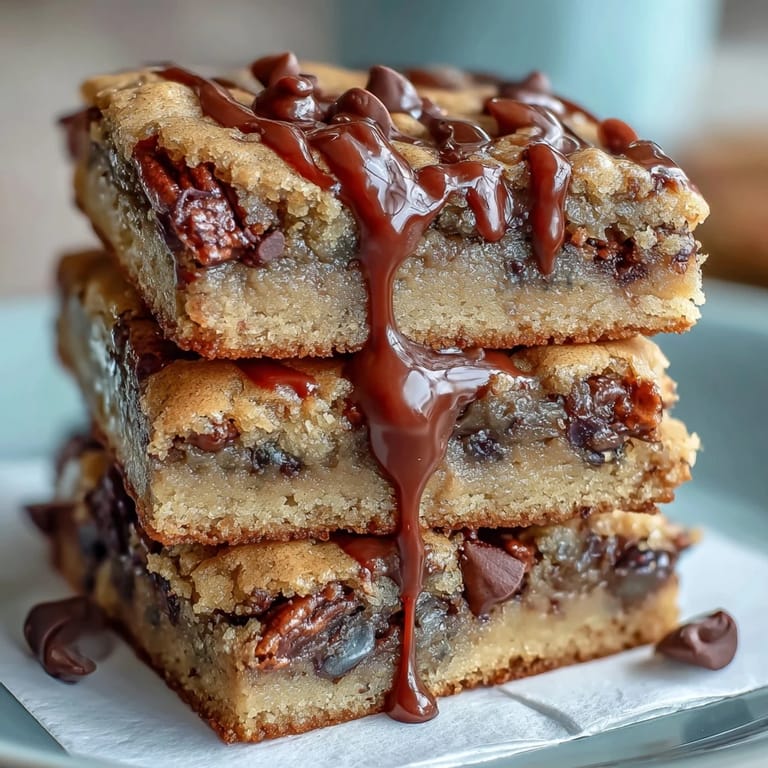
- Semi-sweet chocolate chips (1 cup): These are your flavor anchor, melting into pockets of sweetness throughout.
- Colored candy-coated chocolates (1/2 cup): These don't melt like regular chips, which means they stay intact and give you those fun color pops—the real party element here.
- White chocolate (4 oz): Chop it yourself if you have a block, or use chips—the drizzle is what makes these feel celebration-worthy.
- Vegetable oil (1 tsp): This keeps the white chocolate fluid and glossy when drizzled, so it doesn't seize up on you.
- Sprinkles (optional): If using, add them while the white chocolate is still wet so they stick without sliding around.
Tired of Takeout? 🥡
Get 10 meals you can make faster than delivery arrives. Seriously.
One email. No spam. Unsubscribe anytime.
Instructions
- Get your pan ready:
- Preheat your oven to 350°F and line a 9x13-inch pan with parchment paper, leaving some overhang so you can lift the whole block out later without mangling the edges. This step feels small but saves so much frustration.
- Mix the dry team:
- Whisk together flour, baking soda, and salt in a bowl, making sure there are no lumps of baking soda hiding anywhere. Set it aside and don't touch it yet.
- Cream the sweet base:
- In a large bowl, whisk the melted butter with both sugars until the mixture looks smooth and slightly grainy—this should take about a minute. The butter should be cool enough that the eggs won't scramble when you add them next.
- Bring in the wet ingredients:
- Add eggs and vanilla to your butter-sugar mixture and whisk until everything looks combined and slightly fluffy, about another minute. Don't overthink this step.
- Fold in the flour gently:
- Pour the dry ingredients into the wet mixture and fold everything together with a spatula until you don't see white streaks of flour anymore. The moment you see it all combined, stop—overmixing leads to tough bars, and that's not what we want here.
- Add the chocolate surprise:
- Stir in the chocolate chips and colored candies with a few gentle strokes, letting them scatter throughout. The dough should look like it's studded with little pockets of color and sweetness.
- Spread and bake:
- Pour the dough into your prepared pan and use a spatula to smooth it into an even layer. Bake for 23 to 25 minutes, until the edges are just starting to turn golden and a toothpick inserted in the center comes out mostly clean (a few moist crumbs are fine, dry is not).
- Cool completely:
- Let the bars cool in the pan on a wire rack until they're room temperature—this is important because it helps them set properly. If you try to drizzle while they're warm, the white chocolate will melt into puddles instead of sitting prettily on top.
- Melt the white chocolate magic:
- Chop or measure your white chocolate into a microwave-safe bowl and add the vegetable oil. Microwave in 20-second bursts, stirring between each one, until it's completely smooth and drizzle-able.
- Drizzle with intention:
- Spoon or pipe the white chocolate over the cooled bars in whatever pattern feels right—you can go neat and controlled or artistic and loose. If you're using sprinkles, add them right away while the chocolate is still wet.
- Let it set and slice:
- Give the white chocolate about 30 minutes to firm up, then lift the whole block out using the parchment overhang and cut into 16 squares with a sharp knife. A hot, slightly damp knife works best if the chocolate tries to stick.
 Save
Save What I love most about these bars is that they bridge the gap between simple and impressive—they look like you spent way more time than you actually did. There's something really special about handing someone a bar of these and watching their face light up, knowing you made something that feels entirely celebration-worthy.
The Customization Magic
The real genius of this recipe is how it adapts to whatever you're celebrating. I've made these for a school's blue and gold colors by swapping in the corresponding candy coatings, and I've done pastel rainbow versions for a different kind of party altogether. Once you understand the structure, you can play with it—swap milk chocolate for semi-sweet, add a handful of nuts, use different colored sprinkles. The foundation stays strong enough that these adjustments actually work.
Storage and Longevity
These bars stay soft and delicious for about four days in an airtight container at room temperature, which means you can actually make them a day or two ahead without stress. I've found that keeping them in a single layer with parchment between stacks keeps them from sticking together, and somehow they taste even better the next day when the flavors have had time to meld.
Why This Works for Celebrations
Bar cookies have always felt like the smarter choice for parties—they're easy to transport, look polished on a plate, and people can grab one with their hands without needing a napkin the size of a dinner plate. These specifically hit that sweet spot where they feel indulgent without being overwhelming, and you can make a whole pan in about 40 minutes from start to finish.
- Cut them into slightly smaller squares if you're serving them alongside other desserts, or go bigger if they're the main event.
- The white chocolate drizzle is completely optional—they're lovely without it, but it does add that extra touch that says you cared.
- If you're making these for an outdoor party, keep them in a cool spot because the white chocolate topping can get a little soft in direct sun.
 Save
Save These bars have become my go-to move whenever someone I care about reaches a milestone, and I hope they become yours too. There's something deeply satisfying about sliding a homemade treat across the table to someone you're proud of.
Recipe FAQ Section
- → What gives the bars their chewy texture?
The combination of melted butter and both brown and granulated sugars contributes to the chewy texture of the bars.
- → Can I substitute different chocolates for the candy-coated pieces?
Yes, you can replace the colored candy-coated chocolates with dark or milk chocolate chips or any preferred mix-ins.
- → How do I melt the white chocolate for the drizzle?
Melt white chocolate with a teaspoon of vegetable oil in short microwave intervals, stirring often until smooth.
- → What pan size should I use for baking?
Use a 9x13-inch (23x33 cm) baking pan lined with parchment paper for easy removal of the bars.
- → How should I store the bars after baking?
Store the baked bars in an airtight container at room temperature for up to four days.