 Save
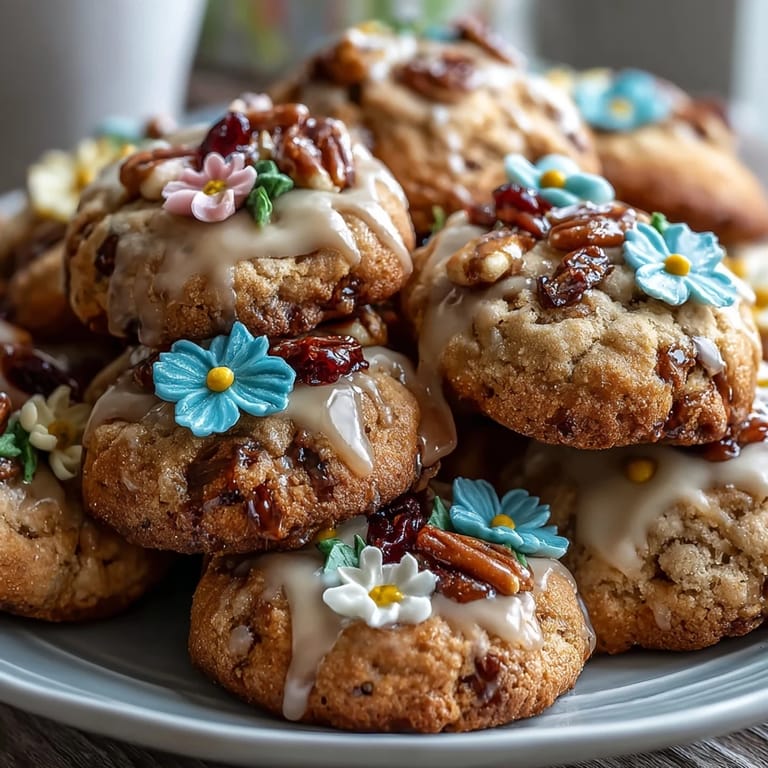
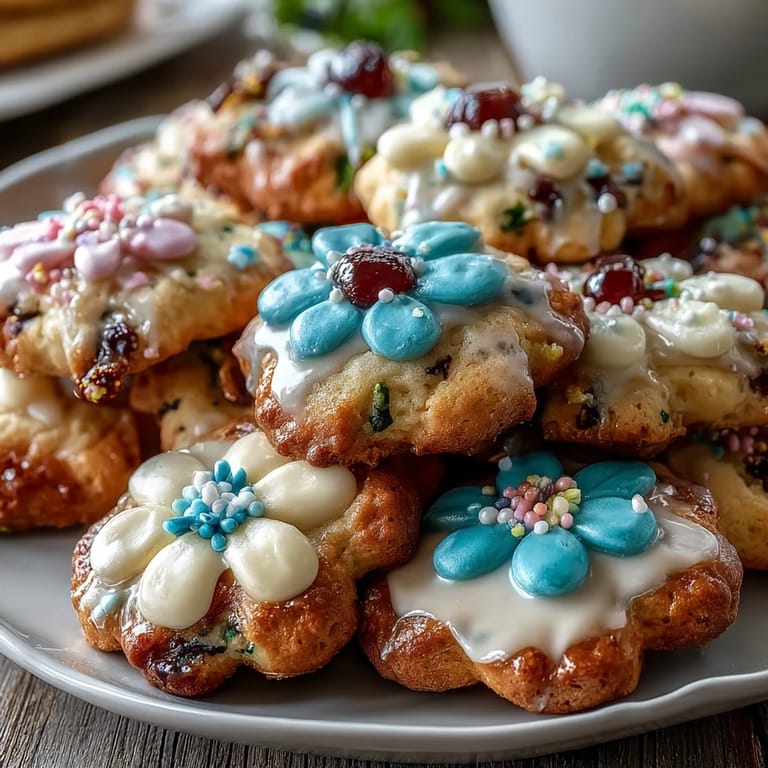
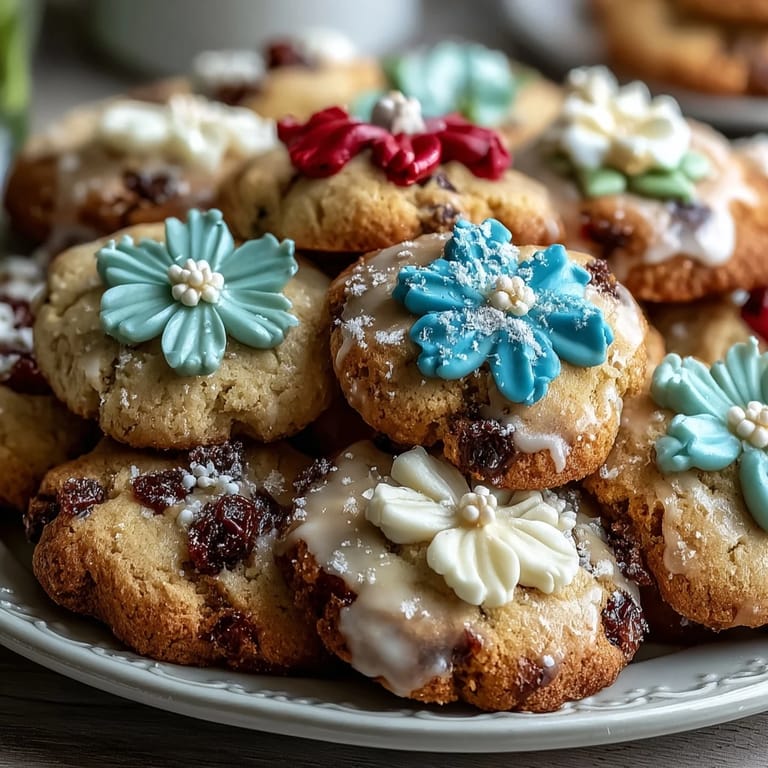
Save My sister called me in a panic three days before her baby shower, asking if I could make cookies that looked like they belonged in a magazine. I'd never piped royal icing flowers before, but something about the challenge made me want to try. That afternoon, I stood in my kitchen with pastels spread across the counter like a painter's palette, and by evening, I'd created these delicate sugar cookies topped with blooming royal icing flowers. It felt like I'd unlocked something magical in baking, and now I can't imagine celebrating spring without them.
I remember handing these cookies to my sister wrapped in tissue paper, and watching her face light up when she opened the box was worth every minute spent piping tiny petals. Her guests were holding them up to the light, admiring the translucent edges of the icing flowers before daring to take a bite. That moment taught me that sometimes the most meaningful gifts come from your own two hands.
Ingredients
- All-purpose flour: Use the weight measurement if possible, as scooping can pack it down and make cookies tough.
- Unsalted butter, softened: Let it sit on the counter for 15 minutes until it yields slightly to pressure—this creates that fluffy crumb.
- Granulated sugar: This specific type dissolves fully into the dough, unlike brown sugar which would change the texture entirely.
- Egg: Room temperature eggs blend more smoothly into the butter mixture without breaking the emulsion.
- Pure vanilla extract: The real stuff is worth it here because it's the only vanilla flavor in the whole cookie.
- Powdered sugar, sifted: Lumps in your icing will clog piping bags, so take the 30 seconds to sift it.
- Egg whites or pasteurized liquid egg whites: Liquid ones are easier and safer if you're uncomfortable with raw eggs.
- Food coloring, pastel shades: Gel colors are more concentrated than liquid, so you need less and they won't thin your icing.
Tired of Takeout? 🥡
Get 10 meals you can make faster than delivery arrives. Seriously.
One email. No spam. Unsubscribe anytime.
Instructions
- Mix the dry base:
- Whisk flour, baking powder, and salt together in a bowl—this distributes the leavening evenly so your cookies rise consistently. Set it aside and don't skip this step.
- Cream butter and sugar:
- Beat them together for 3 to 4 minutes until the mixture is pale and fluffy, which incorporates air and creates a tender cookie. You'll notice the color shift from yellow to almost white.
- Bring the wet together:
- Add the egg and vanilla to your butter mixture and beat until everything looks smooth and combined. Don't overmix once you add the dry ingredients.
- Combine wet and dry gently:
- Add the flour mixture slowly, mixing on low speed until just combined—overworking develops gluten and toughens the dough. Stop as soon as you don't see streaks of flour.
- Chill the dough:
- Wrap it in plastic and refrigerate for at least an hour; cold dough is easier to roll and won't spread as much during baking. I often chill mine overnight because life gets busy.
- Preheat and prepare:
- Set your oven to 350°F and line baking sheets with parchment paper so the bottoms bake evenly without browning too fast. This small step prevents burnt cookies.
- Roll and cut with confidence:
- Flour your surface lightly and roll dough to about 1/4 inch thick, then cut with your favorite flower or round cutters. A light touch with the cutter prevents ragged edges.
- Space them properly:
- Leave an inch between each cookie so they don't bake into each other and lose their delicate shape. This spacing matters more than you'd think.
- Bake until golden:
- Watch for the edges to turn light golden while the centers stay pale, which happens around 10 to 12 minutes depending on your oven. Remove them while they're still slightly soft in the middle.
- Cool completely:
- Transfer to a wire rack and let them cool fully before decorating—warm cookies will make your icing slide right off. This is a good moment to make tea and breathe.
- Build your icing:
- Beat egg whites until foamy, then gradually add sifted powdered sugar until stiff peaks form and the icing looks glossy. This takes about 5 minutes of beating.
- Add color and adjust consistency:
- Divide icing into small bowls and tint each with your chosen colors using gel food coloring—a tiny dot goes a long way. Thin some with water for flooding smooth areas, keep some thick for piping details.
- Decorate with piping bags:
- Fit piping bags with small round or petal tips and pipe delicate flower shapes, vines, and leaves across each cooled cookie. Let the icing dry completely in a cool room before handling.
 Save
Save There's something deeply satisfying about watching blank cookies transform into something that looks like art you bought at a fancy bakery. I've realized that baking isn't just about following instructions—it's about understanding what happens when you cream butter properly or why icing consistency matters, and that knowledge stays with you forever.
The Secret of Tender Cookies
The magic happens when you cream butter and sugar together long enough to incorporate air, which creates tiny pockets that make the cookie light and tender instead of dense and tough. I learned this the hard way after years of impatient mixing. It's one of those kitchen lessons that changed everything about how I bake, and now I can feel when the mixture reaches that perfect pale, fluffy stage. Your arm might get tired, but the result is absolutely worth it.
Royal Icing as a Canvas
Royal icing is basically powdered sugar, egg whites, and a little liquid that hardens to a beautiful, smooth finish—it's been used on cakes and cookies for centuries because it works. What surprised me was how forgiving it is once you understand that it's all about consistency: thin enough to flow, thick enough to hold shape. The colors stay vibrant and beautiful, and unlike buttercream, it won't melt if your kitchen is warm or if the cookies sit out for hours.
Decorating Without Fear
I was nervous about piping flowers the first time, convinced I'd ruin every cookie, but then I realized nobody expects perfection—they expect charm and personality, which is exactly what these imperfect flowers have. A little wobble in a petal makes it look more real, not less, and the whole point is that you made them yourself. Start with simple designs like dots and lines if piping feels intimidating; you'll build confidence with each cookie.
- Practice piping on parchment paper first, let it dry, and peel it off to reuse—this builds muscle memory without wasting finished cookies.
- Keep a damp cloth nearby to wipe the tip of your piping bag between colors so they don't muddy.
- If you make a mistake while the icing is still wet, use a toothpick to gently guide it or scrape it off and try again.
 Save
Save These cookies have become my answer when someone asks me to bring something special to a celebration. They're elegant enough to impress, simple enough to master, and absolutely delicious on top of being beautiful.
Recipe FAQ Section
- → What gives these sugar cookies their delicate texture?
The use of softened unsalted butter creamed with sugar, combined with chilling the dough before baking, ensures a tender, delicate crumb.
- → How is the royal icing made pastel and smooth?
Powdered sugar is beaten with egg whites and a hint of vanilla or almond extract until stiff peaks form, then tinted with food coloring and adjusted for flooding or piping.
- → Can the royal icing flowers be prepared ahead of time?
Yes, flowers can be piped onto parchment and dried in advance, then carefully transferred onto cooled cookies for decorating convenience.
- → What tools are needed to decorate the cookies?
Essential tools include piping bags with small round or petal tips, along with a rolling pin and cookie cutters shaped as flowers or rounds for consistent sizing.
- → How should these cookies be stored to maintain freshness?
Store them in an airtight container at room temperature for up to five days to keep the cookies tender and icing intact.
- → Are there allergen concerns to be aware of?
These cookies contain wheat gluten, eggs, and dairy. Some food colorings used for the icing might also have allergens, so labels should be checked carefully.