 Save
Save My grandmother kept a Mason jar on her counter, tucked behind the fruit bowl where no one but family would notice it. Every carrot peel, onion skin, and celery end found its way into that jar, accumulating like buried treasure. When I asked why she saved garbage, she simply smiled and said, Watch what happens when we take our time. That first batch of broth changed my relationship with my kitchen entirely.
Last winter, during that week when everyone in my house seemed to be fighting off something, I made triple batches. Friends dropped off empty containers and left with full ones, returning later to tell me about how sipping it plain made them feel cared for in a way nothing else could. Food has this power when we slow down enough to notice.
Ingredients
- Vegetable Scraps (5-6 cups): Carrot peels bring natural sweetness, onion skins add incredible golden color, and celery ends contribute that classic savory depth. I keep a gallon bag in my freezer, adding scraps throughout the week until it's full.
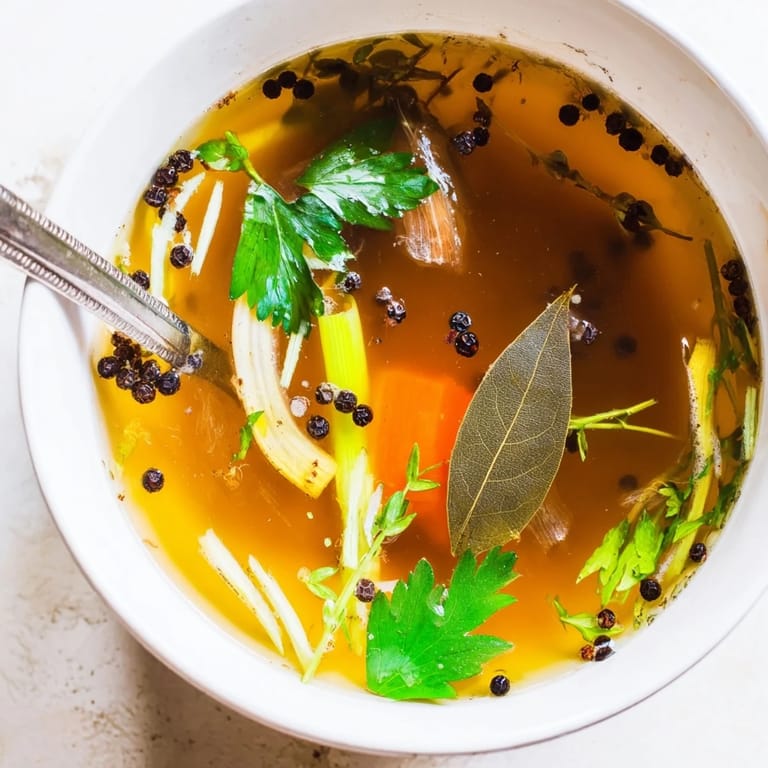
- Bay Leaves (2): These add a subtle earthy backbone that makes the broth taste properly developed rather than just hot vegetable water.
- Black Peppercorns (8-10 whole): Whole peppercorns infuse gentle warmth without the harsh bite of ground pepper, creating a soft heat that builds slowly.
- Garlic (2 cloves, optional): Smashed cloves release their oils into the broth, adding layers of flavor that feel rounded and complete.
- Fresh Parsley or Thyme (1 small handful): Herb stems actually contain more flavor than the leaves, so toss those parsley and thyme stems right in.
- Salt (1-2 teaspoons): Add toward the end so you can control the final seasoning perfectly.
- Cold Water (2 liters or 8 cups): Cold water extracts flavor more gradually than hot, resulting in a cleaner, clearer broth.
Tired of Takeout? 🥡
Get 10 meals you can make faster than delivery arrives. Seriously.
One email. No spam. Unsubscribe anytime.
Instructions
- Gather Your Scraps:
- Collect clean vegetable trimmings from your cooking throughout the week, avoiding bitter brassicas like broccoli and cabbage family vegetables which can overpower the delicate balance.
- Combine Everything:
- Place your scraps, bay leaves, peppercorns, garlic, and herbs into a large stockpot, then pour in the cold water until everything is submerged.
- Bring to a Gentle Boil:
- Set the pot over medium-high heat and watch for the first bubbles to appear, then immediately reduce to maintain a gentle simmer.
- Simmer Slowly:
- Let the broth cook uncovered for about an hour, skimming any foam that rises to the surface with a spoon for a cleaner finished product.
- Season and Taste:
- Add salt gradually, tasting as you go since the flavor concentrates as it simmers.
- Strain Carefully:
- Pour the broth through a fine-mesh sieve or cheesecloth into a clean container, pressing down on the vegetables to extract every bit of liquid gold.
 Save
Save Something shifted in me the day I realized that nothing in my kitchen needed to be waste. This practice turned cooking from a chore into a continuous cycle, each meal feeding the next in ways I had never considered before.
Building Your Flavor Profile
After months of making this weekly, I have learned that mushroom stems add an incredible umami richness that mimics the depth of meat-based stocks. Roasting your vegetable scraps at 400 degrees for 20 minutes before simmering creates a broth with caramelized notes and a darker, more complex character. Leek greens, often discarded, contribute a sweetness that balances earthier vegetables beautifully.
Storage Solutions That Work
I freeze my finished broth in two-cup portions, which happens to be exactly what most recipes call for. Silicone freezer bags lie flat and stack efficiently, thawing quickly in a bowl of warm water when needed. Labeling with the date seems unnecessary until you find a mysterious bag in the back of the freezer six months later, wondering if it is still good.
Using Your Homemade Broth
Beyond the obvious soup applications, try cooking your grains in this broth instead of water. Rice becomes fragrant and deeply savory, quinoa gains new dimensions, and even simple mashed potatoes transform into something remarkable. A splash of this broth can deglaze a pan after roasting vegetables, capturing those caramelized bits into an instant sauce. When reheating leftovers, add a ladle of broth to refresh the texture and restore moisture.
- Keep a small container in the refrigerator for quick additions to sauces and grains
- Reduce the broth by half for an intense glaze to finish roasted vegetables
- Sip it warm with a squeeze of lemon when you need something nourishing and light
 Save
Save Every batch tells the story of what we ate this week, turning the ordinary act of cooking into something quietly sacred. This broth is my favorite way to honor the food that feeds us.
Recipe FAQ Section
- → What vegetables work best for homemade broth?
Carrot peels, onion skins, celery ends, leek tops, mushroom stems, garlic skins, and parsley stems create excellent flavor profiles. These trimmings release deep savory notes when simmered slowly.
- → Which vegetables should I avoid adding?
Steer clear of cruciferous vegetables like broccoli, cauliflower, Brussels sprouts, and cabbage. These can impart bitter flavors that overpower the delicate balance of your broth.
- → How long does homemade broth stay fresh?
Keep refrigerated in airtight containers for up to five days. For longer storage, freeze portions for three months. Thaw overnight in the refrigerator before using.
- → Can I enhance the umami flavor?
Add pieces of kombu seaweed or dried shiitake mushrooms during simmering. These ingredients deepen the savory profile and add complexity without overpowering the vegetable essence.
- → Should I save scraps in the freezer?
Yes, collect trimmings in a freezer bag until you accumulate five to six cups. This ensures you have enough volume for a rich, full-bodied batch whenever you're ready to simmer.