 Save
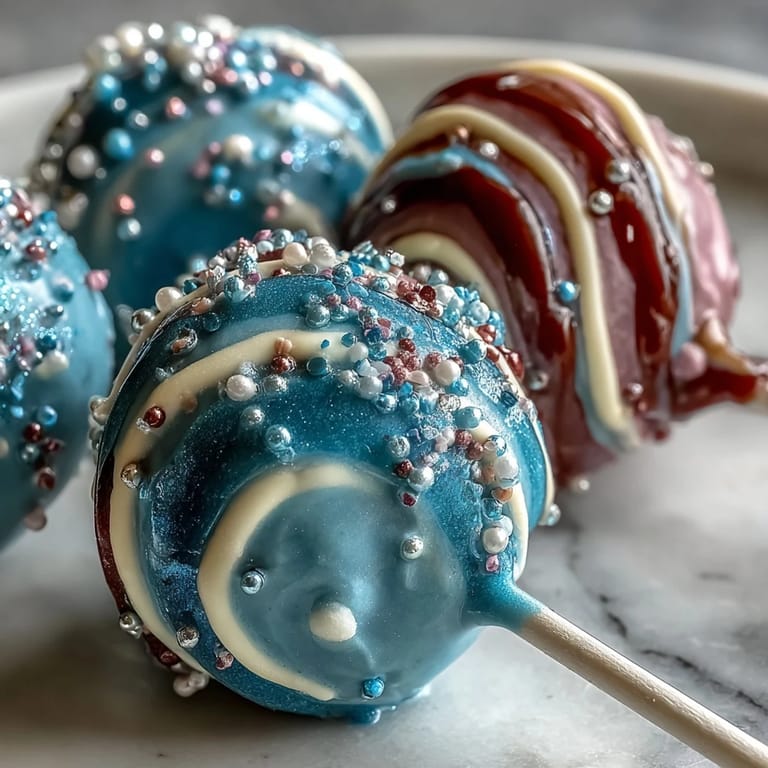
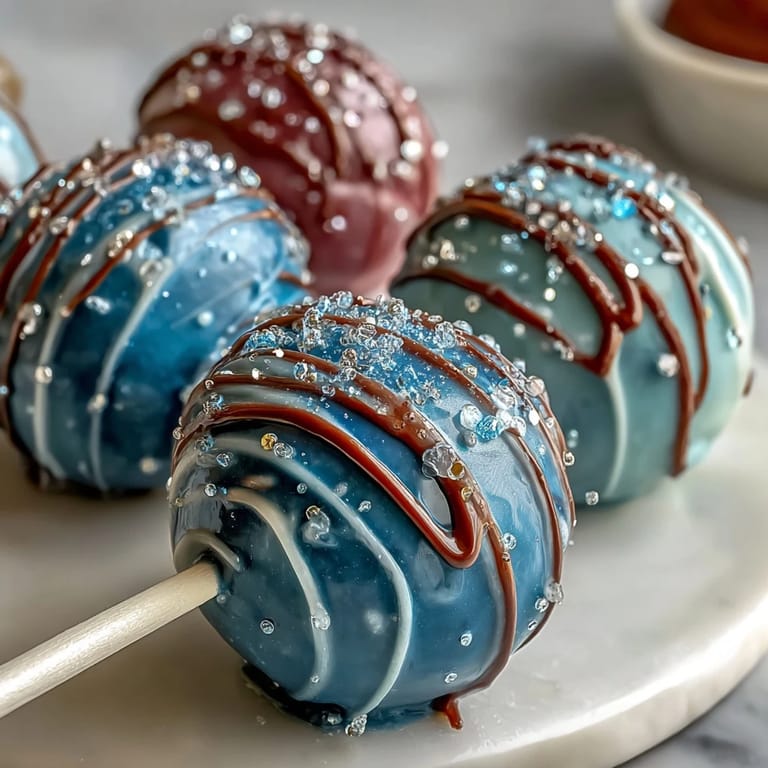
Save My sister called me in a panic the night before her Pisces friend's birthday party, asking if I could make something magical and zodiac-themed. I'd never made cake pops before, but something about the dreamy, swirled galaxy aesthetic felt perfect for the water sign. By midnight, my kitchen smelled like vanilla cake and melted chocolate, and I was dipping tiny spheres into pools of deep purple and teal, watching them transform into little edible planets. When my sister saw them the next morning, she actually gasped—turns out, small magical things really do make the biggest impressions.
I made a batch for a friend's gender reveal party where everyone was convinced the blue and purple swirls meant something prophetic, and honestly, I let them believe it. Watching twelve-year-olds carefully select their favorite galaxy pop like they were choosing a pet rock made me realize these aren't just treats—they're tiny edible decisions. The best part was overhearing someone say they almost didn't want to eat theirs because it was too pretty, which is the highest compliment a dessert can receive.
Ingredients
- 1 box vanilla cake mix (or homemade equivalent): The foundation of everything—use a quality mix if store-bought, or go homemade if you want bragging rights and deeper vanilla notes.
- Eggs, oil, and water (as required by cake mix): These are the binders that transform dry ingredients into actual cake, so measure them carefully despite how forgiving cake mix usually is.
- 1/2 cup unsalted butter, softened: Room temperature is non-negotiable here; cold butter will give you a lumpy frosting that fights back.
- 1 1/2 cups powdered sugar: This is what makes the frosting stick everything together, so don't skip sifting it first to avoid grainy texture.
- 2 tablespoons milk: Just enough to loosen the frosting into something spreadable without making it runny.
- 1 teaspoon vanilla extract: The subtle backbone that keeps everything tasting like comfort rather than artificial sweetness.
- Pinch of salt: The secret that makes people ask what your secret ingredient is.
- 12 ounces white chocolate or candy melts: Candy melts are more forgiving for beginners, but quality white chocolate tastes incomparably better if you're willing to be gentle with it.
- Gel food coloring (navy blue, purple, teal, black, pink): Gel doesn't water down your chocolate like liquid coloring does, which is why this makes the difference between muddy and luminous.
- Edible glitter (silver, blue, or iridescent): The glitter is what catches light and makes people think you spent professional-level effort on these.
- 24 lollipop sticks: These are easier to find than you'd think, and having a few extra prevents mid-project panic.
- Sprinkles or sugar pearls (optional): These add texture and personality, so choose colors that complement your galaxy vibe.
Tired of Takeout? 🥡
Get 10 meals you can make faster than delivery arrives. Seriously.
One email. No spam. Unsubscribe anytime.
Instructions
- Bake and cool your cake canvas:
- Bake the vanilla cake according to instructions and let it cool completely—this step can't be rushed or your frosting will melt. While it cools, grab a mixing bowl and prepare for the transformation ahead.
- Turn cake into crumbs:
- Break the cooled cake into a large bowl with your hands until you have fine, even crumbs with no large chunks remaining. This texture is what lets everything bind together later.
- Create the frosting glue:
- Beat softened butter until it looks almost fluffy, then gradually add powdered sugar while beating to keep lumps from forming. Add milk, vanilla, and salt, then beat until the frosting is smooth and spreadable like buttercream.
- Combine cake and frosting into pop mixture:
- Gradually fold frosting into the cake crumbs, mixing until the texture holds together when you squeeze it in your fist. You want something like moist sand, not wet paste.
- Shape and chill your cake balls:
- Roll the mixture into 1.5-inch balls and place them on a parchment-lined baking sheet, then refrigerate for at least an hour until they feel firm. This chill time is what prevents them from falling apart when you dip them.
- Melt your chocolate base:
- Microwave white chocolate in 30-second bursts, stirring between each, until completely smooth and pourable. Overheating makes it thick and temperamental, so patience here saves frustration later.
- Create your galaxy palette:
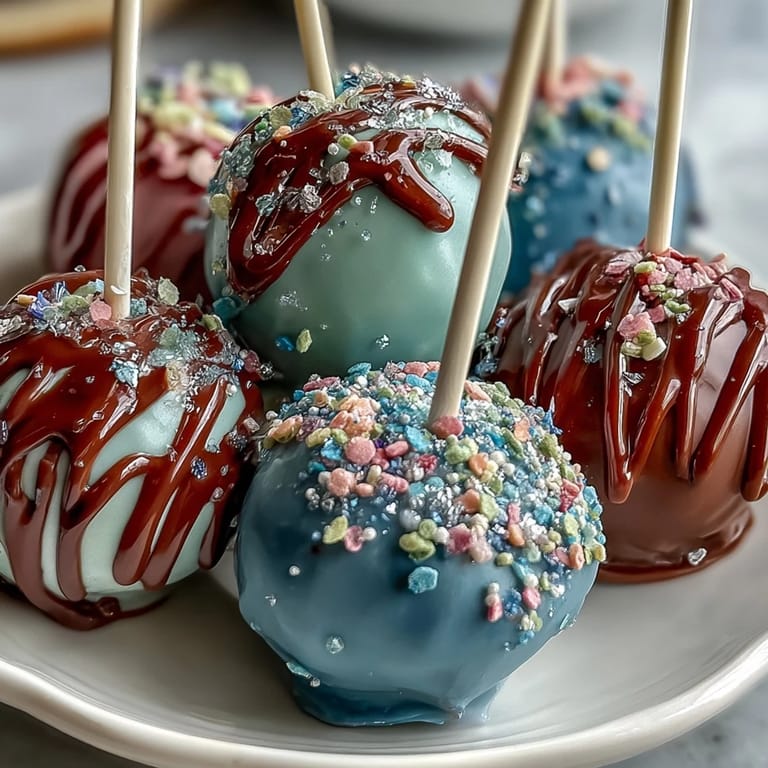
- Divide melted chocolate into small bowls and tint each with gel coloring, starting with one tiny drop and adding more until you reach dreamy depth. Navy, purple, and teal together look like a real galaxy; black and pink add mystery.
- Anchor your sticks:
- Dip the tip of each lollipop stick into melted chocolate and push it halfway into each chilled cake ball, then return them to the fridge for 10 minutes. This adhesive dip prevents the cake pop from spinning off the stick mid-dip.
- Create the galaxy swirl:
- Hold a cake pop by the stick and dip it into your first color, gently twisting it so the chocolate coats evenly, then carefully swirl in a second color before it sets. The magic happens in this swirling—it doesn't have to be perfect to look intentional.
- Set your finished pops:
- Place each finished pop upright in a styrofoam block or cake pop stand and let it set at room temperature. If you're impatient, the fridge speeds this up, but room temperature gives you a less brittle coating.
- Add the final shimmer:
- While the chocolate coating is still slightly tacky, sprinkle with edible glitter and optional sprinkles before it fully hardens. Timing is everything here—too early and it sinks, too late and it won't stick.
- Final set and serve:
- Allow pops to set completely before handling, then admire what you've created. They're ready to serve and almost too pretty to eat.
 Save
Save I learned the power of these cake pops when my mom found one hidden behind the fruit in the fridge, kept it there for days because she couldn't decide if she wanted to eat something that beautiful. Eventually she did eat it, and she told me it tasted like childhood memories mixed with stardust, which might be the most honest compliment anyone's ever given me. That's when I understood that sometimes food is actually about wonder first and flavor second.
The Galaxy Color Technique
The secret to a truly mesmerizing galaxy look is understanding that you're not trying to blend colors smoothly—you're creating contrast and depth. Start with your darkest color as the base dip, then immediately swirl in lighter shades while the chocolate is still wet so they sit on top rather than mixing into mud. Think of it less like painting and more like creating natural color variations, the way real galaxies have bright nebulas against dark space.
Storage and Make-Ahead Magic
These cake pops genuinely improve with a day or two in the fridge because the flavors settle and the coating firms up to that perfect snap-and-give texture. You can actually make the cake balls and freeze them for up to two weeks before decorating, which means you can handle the dipping and glittering part when you're more rested and patient. In an airtight container, finished pops last five days in the fridge, though they rarely make it that long once people know they exist.
Customization and Zodiac Variations
While these are designed for Pisces with their dreamy water-sign colors, the same technique works beautifully for any zodiac sign if you adjust your color palette accordingly. Leo demands gold and burnt orange, Capricorn looks sophisticated in deep forest green and silver, and Aries practically insists on fire-hot reds and oranges. You could even add a tiny fondant symbol or write initials with melted chocolate, though I've found that sometimes the simpler the decoration, the more elegant the result.
- For Pisces authenticity, add a few drops of almond extract to the frosting for that soft, dreamy quality.
- If you want them to look extra magical, use iridescent glitter that shifts colors under different light.
- Consider making a batch in monochrome colors if you want sophistication instead of whimsy.
 Save
Save Every time I make these, I'm struck by how something so visually stunning can come from such simple ingredients and basic techniques. They remind me that magic in the kitchen often just means caring enough to pay attention to small details like temperature and timing, and being willing to experiment with color and swirls.
Recipe FAQ Section
- → How do I create the galaxy swirl effect on the cake pops?
Melt colored chocolate in separate bowls, then dip and swirl each cake pop gently to blend the colors and resemble a galaxy pattern.
- → What type of edible glitter works best for coating?
Use fine, food-safe glitters in silver, blue, or iridescent shades to add sparkle without altering flavors.
- → How long should the cake pops chill before coating?
Chill the shaped cake balls in the refrigerator for at least 1 hour to ensure they hold shape during dipping.
- → Can I substitute the vanilla cake mix with homemade cake?
Yes, homemade vanilla cake baked and crumbled works equally well as the base for these pops.
- → What are some decoration alternatives besides edible glitter?
Sprinkles or sugar pearls can be added while the coating is tacky for extra texture and decoration.