 Save
Save There's something about pulling warm scones from the oven that makes you feel like you've unlocked a secret—that moment when your kitchen suddenly smells like a proper British tearoom, and you know you're about to impress someone. My neighbor once mentioned offhandedly that she'd never had a homemade scone, and I became slightly obsessed with proving that they're actually easier to make than people think. What started as a casual afternoon baking project turned into a tradition, and now these tender, golden rounds are my go-to when spring finally arrives and the weather feels like tea time.
I'll never forget the spring morning when a friend arrived unannounced just as I'd pulled these from the oven—the timing felt almost orchestrated by the universe. She stayed for three hours, and we went through the entire batch with different jams while sitting on my porch, watching the neighbors walk by wondering what smelled so incredible. That's when I realized these scones had become less about following a recipe and more about creating an excuse to slow down.
Ingredients
- All-purpose flour (2 cups): This is your foundation, and it needs to be measured correctly—I learned the hard way that scooping directly from the bag packs it down and ruins everything.
- Granulated sugar (1/4 cup): Just enough sweetness without overpowering the delicate crumb; it dissolves into the dough rather than adding grittiness.
- Baking powder (1 tablespoon): The unsung hero that gives these their signature rise and tender structure.
- Fine sea salt (1/2 teaspoon): A pinch of salt actually makes the other flavors sing without tasting salty itself.
- Unsalted butter, cold and cubed (1/2 cup): Cold butter is absolutely non-negotiable—it's what creates those beautiful tender crumbs and ensures they stay light rather than dense.
- Whole milk (2/3 cup): Brings moisture and richness; whole milk makes a noticeable difference compared to lower-fat versions.
- Egg (1 large): Acts as both binder and the secret weapon for that beautiful golden top when brushed on.
- Pure vanilla extract (1 teaspoon): A subtle background note that adds warmth and depth without being identifiable.
- Clotted cream (1 cup to serve): The luxurious element that transforms good scones into unforgettable ones.
- Quality fruit jam (1 cup to serve): Splurge on something you'd actually eat on its own—cheap jam is where the magic dies.
Tired of Takeout? 🥡
Get 10 meals you can make faster than delivery arrives. Seriously.
One email. No spam. Unsubscribe anytime.
Instructions
- Heat your oven and prepare:
- Get your oven to 425°F and line a baking sheet with parchment paper. This temperature ensures they rise quickly and develop that golden exterior while staying tender inside.
- Mix your dry ingredients:
- In a large bowl, whisk together the flour, sugar, baking powder, and salt. Whisking incorporates a little air and ensures the baking powder is evenly distributed—no dense pockets of bitterness.
- Cut in the cold butter:
- Add your cold, cubed butter to the dry mixture and use a pastry cutter or your fingertips to work it in until it looks like coarse breadcrumbs. The butter should remain in small pieces; this is what creates the tender, flaky texture everyone dreams about.
- Combine the wet ingredients:
- In a small bowl, whisk together the milk, egg, and vanilla until smooth. This step takes 30 seconds and prevents lumps when you add it to the dry ingredients.
- Bring it all together:
- Pour the wet mixture into the dry ingredients and gently mix with a fork until just combined. Stop as soon as you don't see streaks of flour—overworking develops gluten and makes them tough instead of tender.
- Shape your dough:
- Turn the dough onto a lightly floured surface and gently pat it into a 1-inch thick round. Treat it like it's precious; rough handling makes them dense and sad.
- Cut out the scones:
- Using a 2.5-inch cutter, stamp out 8 rounds in one clean motion, twisting slightly rather than pushing straight down. This seals the edges and helps them rise evenly; gather scraps gently and re-roll only once.
- Finish the tops:
- Place scones on your prepared baking sheet and brush the tops lightly with milk. This creates that signature golden, slightly shiny finish.
- Bake until golden:
- Bake for 12 to 15 minutes until risen and golden brown on top. They're done when they feel light and sound hollow when you tap the bottom.
- Cool and serve:
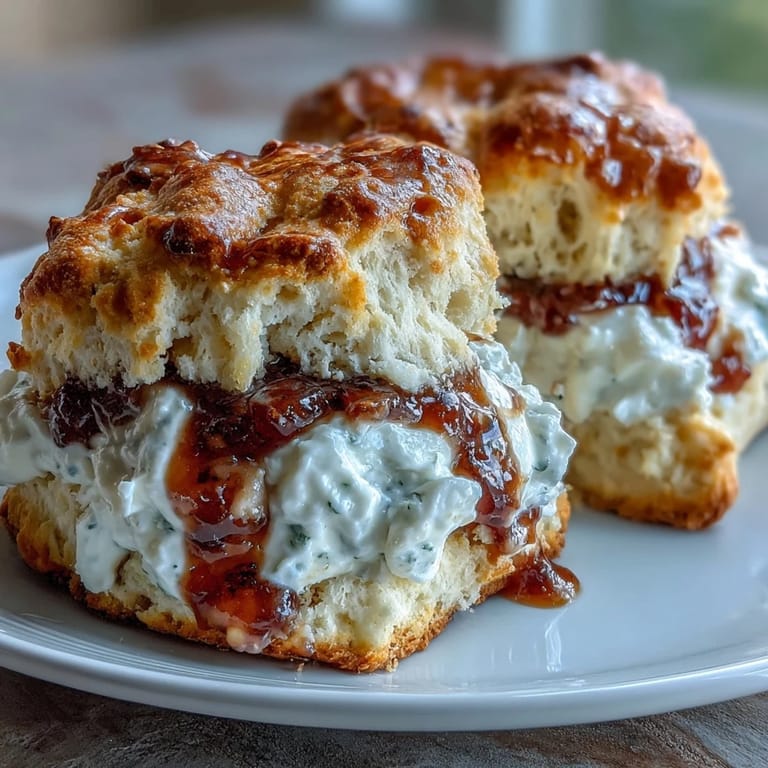
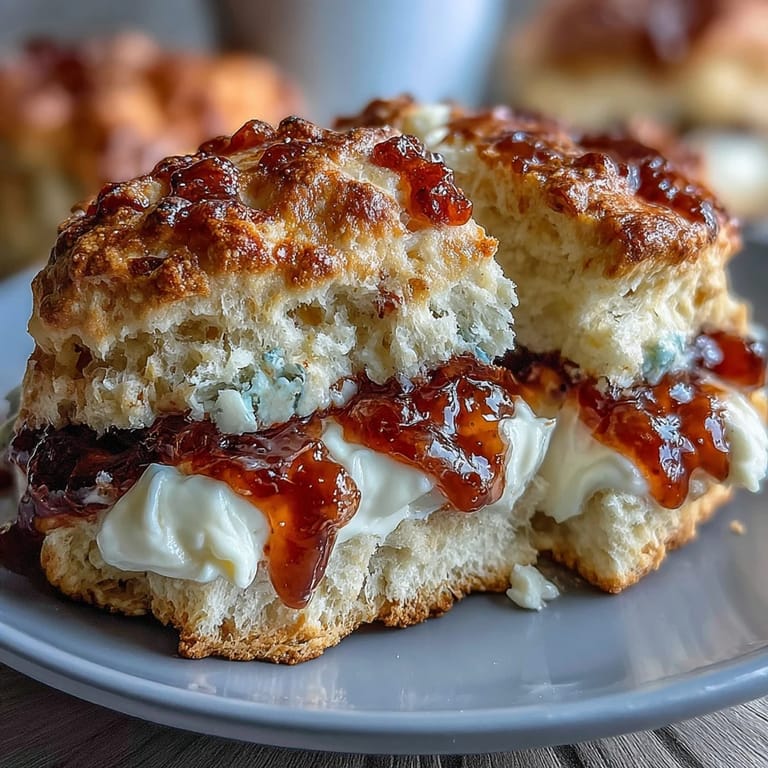
- Transfer to a wire rack and let cool for just a few minutes. Serve them warm with clotted cream and jam—the warm scone helps the cream soften slightly, creating something between a spread and a melt.
 Save
Save There was an afternoon when my teenage daughter actually put her phone down to help me make these, and we ended up laughing about the flour explosion when we opened the bag too enthusiastically. Those small moments—the ones where cooking becomes something shared and unrushed—are why I keep coming back to this recipe.
The Secret to Tender Scones
The difference between scones that are wonderful and scones that are legendary comes down to one thing: treating your dough like it's delicate. I used to over-knead and over-work, thinking more effort meant better results, but the opposite is true. Once you stop mixing as soon as you see no flour streaks, you've won half the battle. The butter will start releasing its steam during baking, creating tiny pockets of air that make the crumb almost melt on your tongue.
Timing and Temperature Matter More Than You Think
I once made these on a humid summer day and they came out slightly dense, while the exact same recipe on a crisp spring morning was perfection. Temperature and humidity affect how flour behaves, so don't be surprised if you need slightly less milk one day and slightly more another. The dough should come together gently without being sticky—if you need an extra tablespoon of milk, add it slowly.
Variations and Ways to Make Them Your Own
Once you've mastered the basic version, the door opens to endless possibilities. I've added lemon zest for brightness, replaced half the milk with heavy cream for extra richness, and even experimented with a touch of almond extract. The beauty of scones is that they're a canvas—the recipe stays structurally sound even when you play with flavors.
- Try lemon curd or honey instead of jam for a completely different but equally delicious experience.
- For extra richness, replace half of the milk with heavy cream and watch your guests wonder how you made something so indulgent at home.
- Scones freeze beautifully for up to three months—wrap them well and reheat gently in a 300°F oven for about five minutes.
 Save
Save These scones have a way of turning an ordinary afternoon into something worth remembering. Pull them warm from the oven, split them open, and let the rest take care of itself.
Recipe FAQ Section
- → What makes these scones tender and flaky?
Using cold, cubed butter and working it into the dry ingredients until coarse crumbs form helps create a tender, flaky texture. Gentle mixing ensures the dough isn’t overworked.
- → Can I substitute the clotted cream or jam?
Yes, lemon curd, honey, or other quality spreads can be used for a different flavor twist while maintaining the scones' rich taste.
- → How can I tell when the scones are perfectly baked?
Look for risen, golden tops and a slightly firm texture. Baking for 12–15 minutes at 425°F achieves the ideal result.
- → Is it possible to prepare the dough ahead of time?
The dough can be chilled briefly before baking to help with handling, but it’s best baked fresh for optimal rise and texture.
- → What is the purpose of brushing the tops with milk?
Brushing with milk before baking promotes a golden, slightly glossy finish, enhancing both appearance and texture.